Great job! You managed to configure Cogent DataHub® to fit your needs, and now you are ready to run it in a production environment, but you are left with one question – “How in the world do I run DataHub as a service?”.
Running applications as Windows services has multiple benefits but, perhaps, the most beneficial reason to run an application as a service is the ability to let the application/process run in the background without the need for a user to be logged on the operating system. For that reason, this might be why you are looking at how to run it as a service, whether you are tunneling, logging, aggregating, historizing data, and/or using Datahub as a Gateway.
Continuing our Tech Support Corner blog series, if you find yourself in this situation like other users over years, do not worry. This post will walk you through the process of running DataHub as a service as well as how to access its properties from a local and/or remote machine.
While this post assumes that you've worked with Cogent DataHub® previously, if you are new to Datahub and just getting started, we have tons of getting started resources, as well. Please feel free to become more acquainted with DataHub features and capabilities first by visiting our DataHub Learning Resources page.
In the past, it could be problematic to run DataHub as a service since Windows makes it difficult to modify the configuration of process running as a service due to the way Windows handles interaction of the desktop with Windows services.
To address this difficulty, since Version 9, DataHub has supported secure remote configuration to address both local access when DataHub is running as a Windows service and remote management and configuration of distributed DataHub installations.
How to Setup Cogent DataHub Remote Configuration Ability
To access your project configuration while running DataHub as a service, you will need to first configure DataHub’s Remote Config feature. This is a feature that enables you to interact with the instance of DataHub that is running as a Service locally or remotely.
If you would like to learn more about Remote Config and/or watch a video on how to configure it, visit our tutorial page - How to Securely Configure Remote and Local Nodes with Cogent DataHub. However, below you will find a summary of the steps on how to configure it and how to use it to connect to the Datahub instance.
How to Setup Cogent DataHub Security for Remote Configuration
This process can be used to allow multiple users access to the configuration properties from different machines:
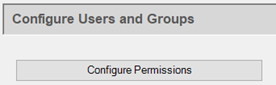
- In the DataHub Properties, go to Security → Configure Permissions.
- Add a new username to the Users list.
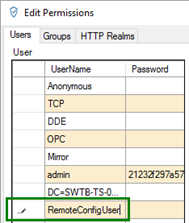
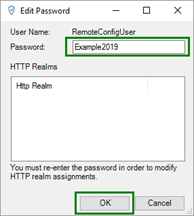
- Click in the Password field next to your new user and enter the desired password:
- Must be at least 8 characters
- Must be mixed case containing a minimum of one capital letter
- Must NOT be a capitalized word (such as Password, for instance)
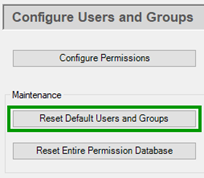
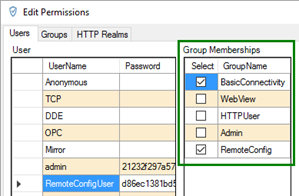
- Check RemoteConfig and BasicConnectivity under Group Memberships. If a RemoteConfig group is unavailable, add it in one of the following ways:
- Under Security, click the “Reset Default Users and Groups” button.
- In the Configure Permissions window, go to the Groups tab and add a new RemoteConfig group with the permissions ConfigAdmin and LoadConfig.
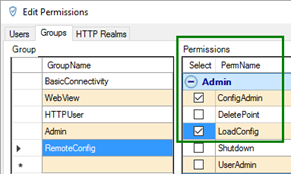
- Then ensure that your new user belongs to your new RemoteConfig group, as shown below.
- Under Security, click the “Reset Default Users and Groups” button.
- Click Apply and Close.
How to Setup Cogent DataHub Permissions for Remote Configuration
Now that DataHub Security is properly configured, this process configures DataHub to allow connections from local and/or remote machines:
- In the DataHub Properties interface, go to the Remote Config section.
- Enable or disable specific properties allowed for local and/or remote connections
(NOTE: in the screenshot below, you only see local permission enabled. If you need remote permissions enabled, you will need to check the boxes of the modules for which you would like a remote user to have access).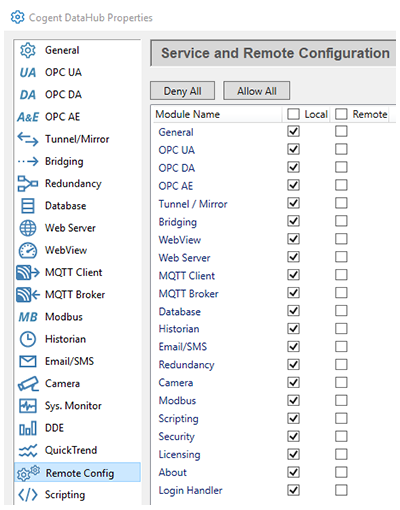
- Click Apply.
- In DataHub Properties under Web Server, make sure “Act as web server” is checked and set the port under "Base Configuration". Include whether SSL is enabled.
(NOTE: It is recommended to change the port from 80 to 8080 (or another preferred port), as 80 is often used for other connections)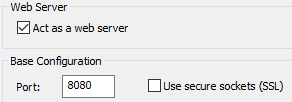
- While still under the Web Server properties, it's also important to make sure the "Document root directory" is correctly specified. By default, this should specify the following directory:
C:\Program Files (x86)\Cogent\Cogent DataHub\Plugin\WebServer\html - In DataHub Properties under Tunnel/Mirror, choose whether to accept connections and set the port under Tunnel/Mirror Master. Include whether SSL is enabled.
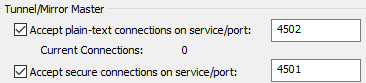
- Make sure to click Apply after all changes to ensure they take effect.
How to Test Your DataHub Remote Config Settings Locally
Now that Remote Config and Security settings are configured in your DataHub, the following process can be used to test that the DataHub is accessible using Remote Config from the local machine, which will ensure success once you've configured DataHub to run as a service.
For remote configuration, DataHub Version 9 and above install with a special Remote Config client for connecting to local DataHub installation or to remote DataHub installation (if you happen to have DataHub installed on a remote machine - keep reading for an alternative method to access remotely installed DataHub installations using Remote Config):
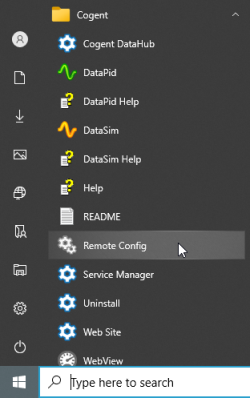
- Open Remote Config from the Windows Start menu.
- Give the connection a friendly name and specify the Host as “localhost”.
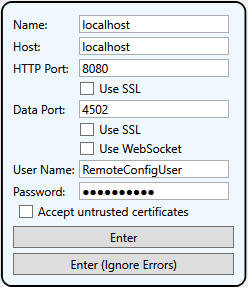
- Ensure that the HTTP Port and Use SSL properties match those that were configured in the Web Server properties previously.
- If a WebSocket connection is not being used, ensure that the Data Port and UseSSL. properties match those that were configured in the Tunnel/Mirror properties.
- For the User Name and Password, use the credentials previously configured in the Security properties that were discussed earlier.
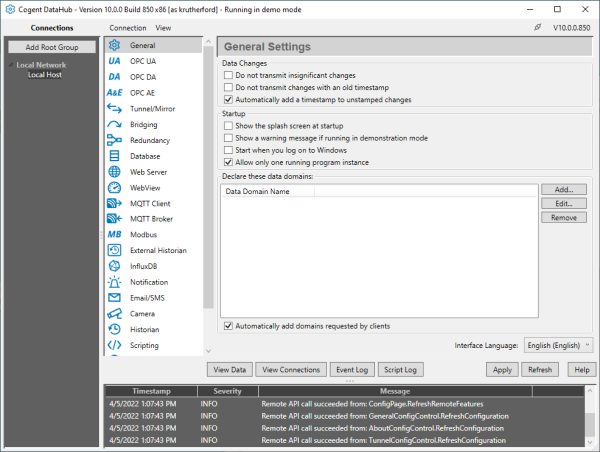
- Click Enter to make the connection. Once successfully connected, you'll see the familiar DataHub Properties available in the Remote Config client.
NOTE: If accessing a remote DataHub and you have any trouble getting the Remote Config client to connect, ensure that the Ports that you have specified are not blocked by a firewall and that the machine you are attempting to access is actually accessible from your local machine.
How to Configure DataHub to Run as a Windows Service
Now that it has been confirmed that DataHub is accessible using the Remote Config client, it's time to configure DataHub to run as a service.
- First, exit the DataHub instance from the system tray.
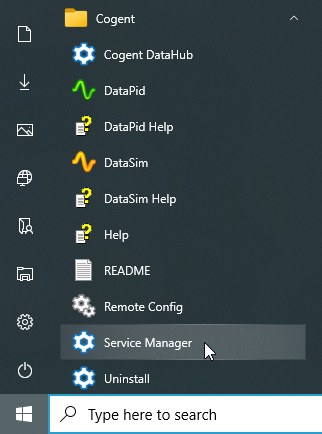
- Open the Service Manager under the Cogent group in the Windows Start menu.
- There are several settings to consider here, per the below screenshot:
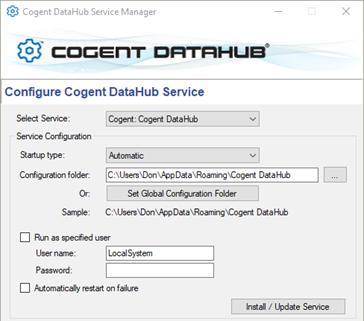
- Set Startup type to Automatic, Manual, or Disabled as desired
- The Configuration folder is typically left as default. If changed, all files must be manually moved from the current configuration folder to the new location.
- If you would like to run the Service under a specific user’s credentials, you will need to check the box “Run as specific user” and enter the user account credentials. If not, the Service by default will run under the LocalSystem account.
- Click Install/Update Service to install DataHub as a service.
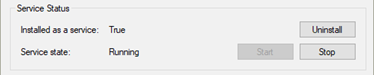
- Use the Service Status section to monitor the state of the service and confirm DataHub is successfully running as a Windows service now.
How to Use Remote Config from a Machine Without DataHub
Last but not least, for situations where you need to configure a remote DataHub instance and your local machine doesn't have DataHub installed, there is an alternative Web Application Manager that can be downloaded and used to access a network accessible DataHub instance remotely.
- On the client machine, in a web browser, enter one of the following:
- If SSL is enabled for use with the Web Server on the remote DataHub, enter the IP Address and Port of the remote DataHub machine in the form https://xxx.xxx.xxx.xxx:yyyy where xxx.xxx.xxx.xxx is the IP Address and yyyy is the Port that is specified in the Web Server settings of the remote DataHub.

- If SSL is NOT enabled for use with the Web Server, enter the IP Address and Port of the remote DataHub machine in the form http://xxx.xxx.xxx.xxx:yyyy where xxx.xxx.xxx.xxx is the IP Address and yyyy is the Port that is specified in the Web Server settings of the remote DataHub.
(NOTE: Most current web browsers will assume the https:// part if you start with the IP Address so this will not work if you have SSL enabled in the DataHub Web Server.
- If SSL is enabled for use with the Web Server on the remote DataHub, enter the IP Address and Port of the remote DataHub machine in the form https://xxx.xxx.xxx.xxx:yyyy where xxx.xxx.xxx.xxx is the IP Address and yyyy is the Port that is specified in the Web Server settings of the remote DataHub.
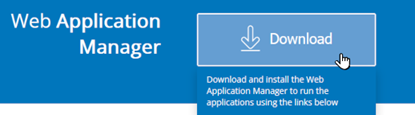
- This loads the Web Application Manager launch page hosted by the remote DataHub Web Server.
(NOTE: If you have issues connecting, make sure there isn't a firewall on either machine blocking the specified yyyy Port and that the remote DataHub is network accessible to the client machine. And, if you receive a "404 Page Not Found" error, make sure the "Document root directory" in the DataHub Web Server properties is specified correctly, as this is where the launch page html is located - default location is C:\Program Files (x86)\Cogent\Cogent DataHub\Plugin\WebServer\html) - Download and install the Web Application Manager from the launch page.
- Once installed, on the launch page, click “Launch Remote Config”.
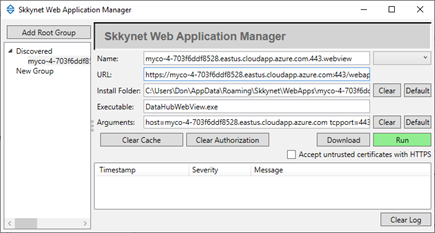
- In the Web Application Manager window, click “Run.” This will download the necessary files to run the application.
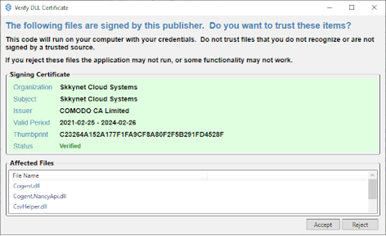
- Verify the details of the signing certificate and click “Accept” to access the application.
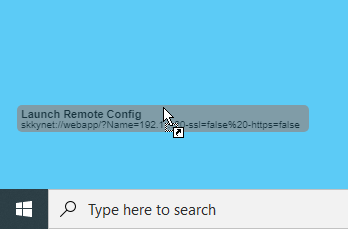
- In the Web Application Manager launch page, you can also click and hold the "Launch Remote Config" button then drag the link from the launch page directly to desktop to create a shortcut for easily launching later.
- After the first instance, clicking the “Launch Remote Config” button or using the desktop shortcut will immediately launch the application without downloading the files again.
As you can see, with secure remote configuration capabilities, you can easily manage local and distributed network accessible DataHub's even when running as a Windows service.
Don't forget to subscribe to our blog to find out about more relevant technical topics applying to industrial process automation and solving related challenges. Want to try configuring your own Cogent DataHub as a Windows service and using Remote Config?


