The Google Cloud Platform (GCP) is Google’s cloud solution that brings all of Google’s cloud computing services together. Google’s own services, such as Google Search and YouTube, run on the GCP, but end users can also use their cloud services.
Google Cloud Platform, for the Internet of Things (IoT) area, offers their “Cloud IoT Core” services, which provide the functionalities to connect large quantities of devices via an integrated MQTT broker. In this blog post, we will show the necessary steps for connecting this Cloud IoT Core to the different data interfaces supported by OPC Router.
So you're likely either already an OPC Router user interested in integrating your existing systems with Google IoT or you're new to OPC Router but have a supported system that you need to integrate with Google IoT.
First, it's assumed that:
- You have a Google Cloud Platform (free or paid) account
- If not, you can register for a free starter account here:
https://cloud.google.com/free/
- If not, you can register for a free starter account here:
- You have a data source configured in OPC Router for the data you'd like to push to Google IoT Cloud
- If not, we have a Quick Start guide for OPC Router here: https://support.softwaretoolbox.com/app/answers/detail/a_id/3897
So, with those details taken care of, let's begin!
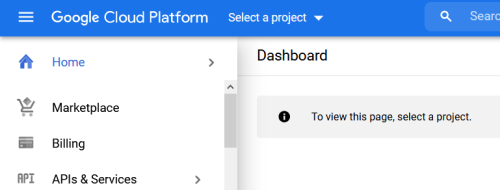
Step 1: Create a new Project in Google Cloud
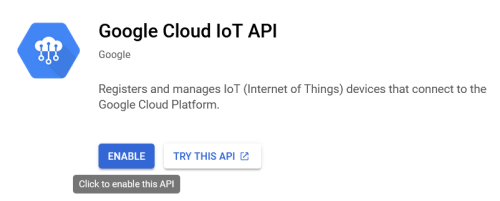
- First, ensure your account has the Google Cloud IoT API enabled. You can do this through the Marketplace. Search IoT API and select Google Cloud IoT API. If it is not enabled, you will be able to click ENABLE.
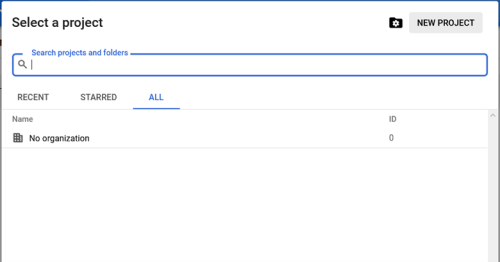
- While logged in to your Google Cloud account in the Google Cloud Console, you'll click on Select a Project at the top.
- Next, you'll click the New Project button to begin the creation process.
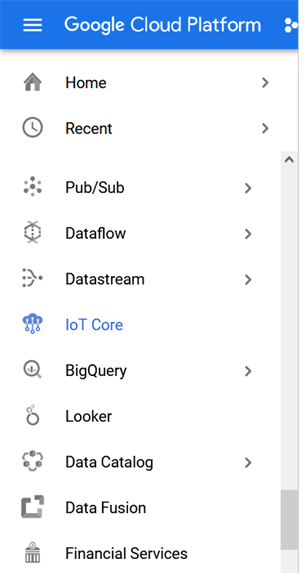
Step 2: Create a Google Cloud IoT Core Registry
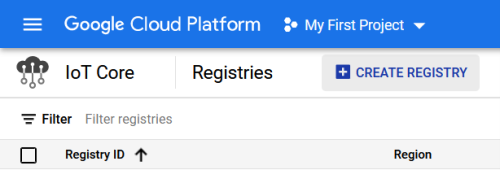
- Now that you have created a project, open the IoT Core from the left-hand menu.
- Then click on the CREATE REGISTRY button towards the top.
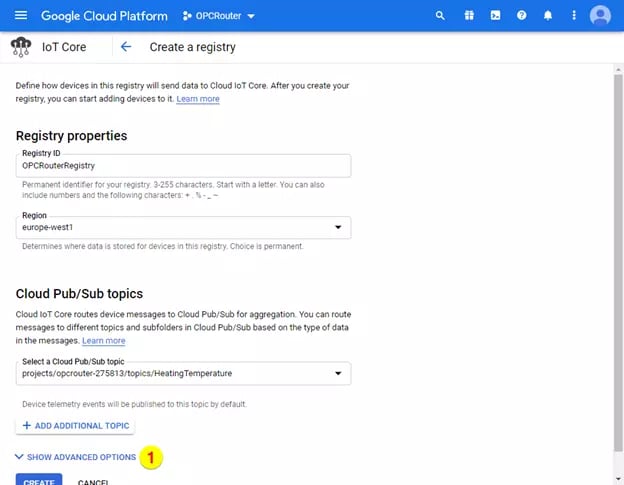
- Set a user-configurable Registry ID (1). In this example, we will use the Registry ID OPCRouterRegistry. Then select the Region (2) that is closest to you - this is permanent, so make sure to select the correct region since choosing a region that is significantly distant geographically from MQTT clients could negatively impact performance.
Open the dropdown list of the topics under Select a Cloud Pub/Sub topic (3):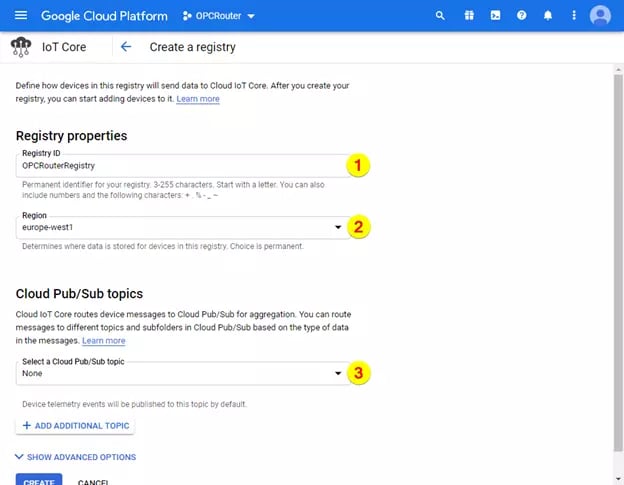
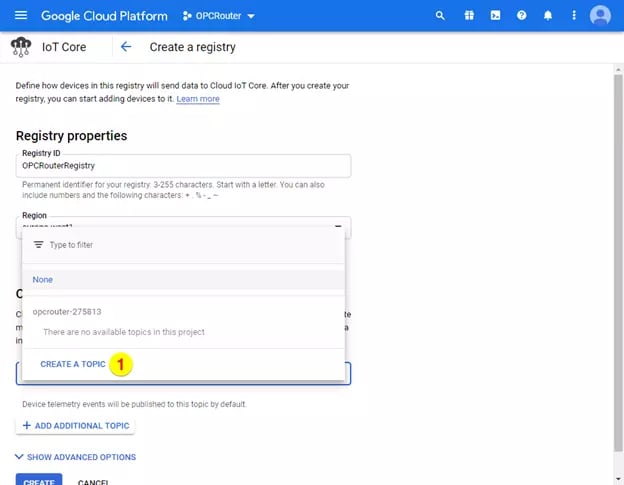
- Click on CREATE A TOPIC in the opened dropdown list.
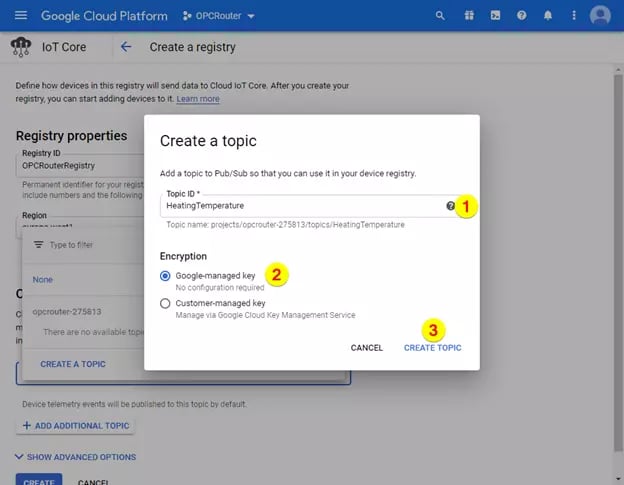
- Put in a Topic ID (1), choose the encryption “Google-managed key” (2) and click on CREATE TOPIC (3), as shown below:
- Open the SHOW ADVANCED OPTIONS section as shown below:
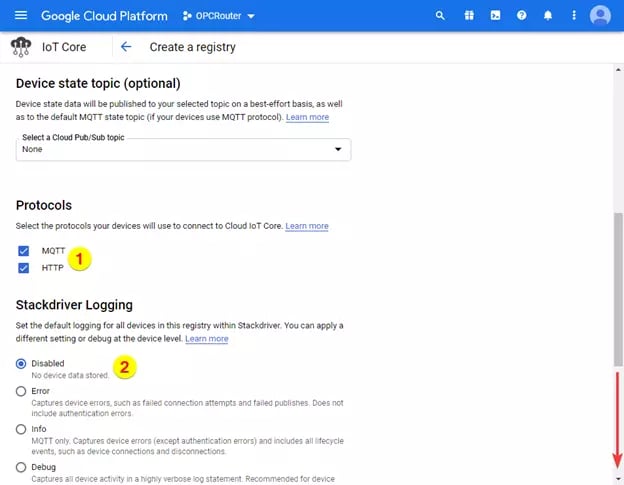
- Enable the protocols “MQTT” and “HTTP” (1) and set Stackdriver Logging (2) to Disabled, as shown below.
- Then set the Input Method for CA Certificate to “Enter Manually” under the CA certificate input method (1) and, after that, click on CREATE (2), as shown below:

Step 3: Generate a Certificate in OPC Router
Now we just need the certificate. In the OPC Router configuration:
- Create an instance of the MQTT Plugin:
- Click Plugins (1)
- Click MQTT under Cloud / IoT (2)
- Click on the Button to create a MQTT plugin (3)

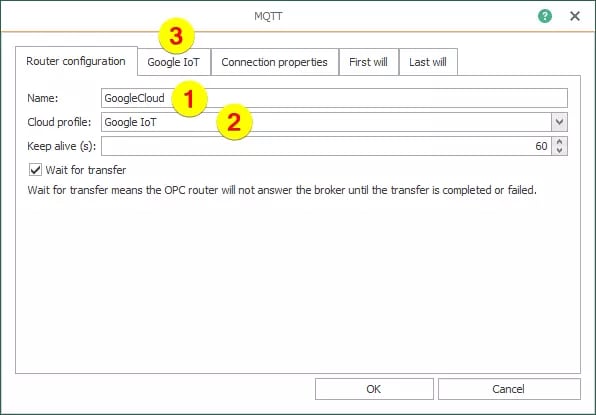
- Put in the following data on tab “Router configuration”:
- Name (1) - Specify a descriptive name that will represent this connection in your OPC Router configuration.
- Cloud profile (2) - Setting this to "Google IoT" makes it easier for you to enter the Google-specific connection data for the MQTT connection.
- After that click on tab Google IoT (3).
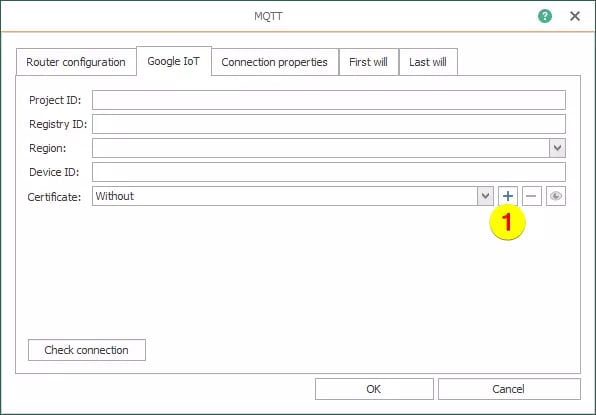
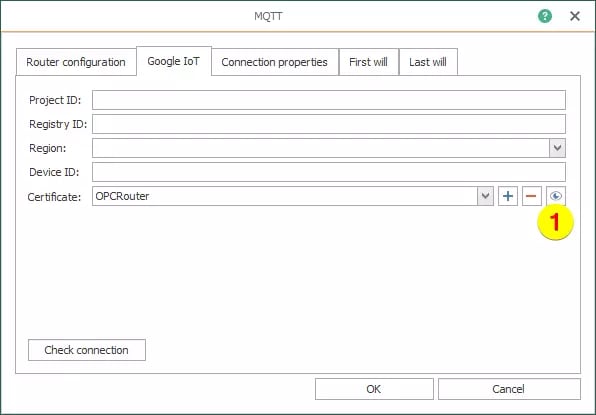
- In the Google IoT section, click on the Plus + button (1) to create a certificate:
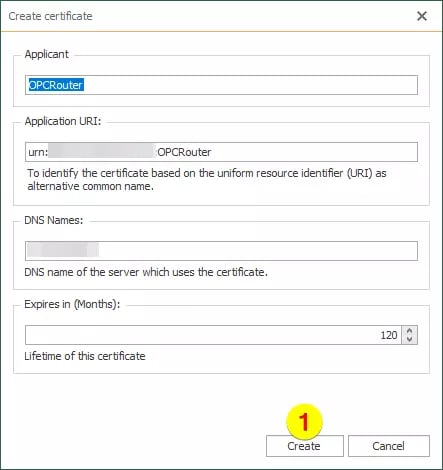
- Fill out the certificate as required for your application, including the desired lifetime of the certificate (determines how frequently the certificate will need to be reissued and exchanged again) and click on the Create button (1):
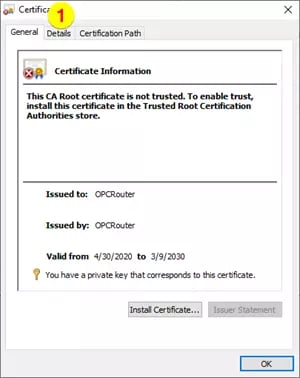
- Click on the View (Eye) button (1) to open and view the new certificate properties:
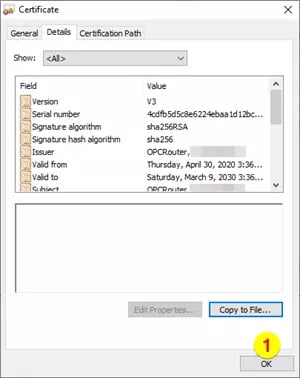
- Click on the Details tab (1) of the certificate properties:
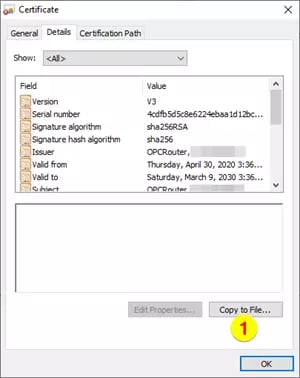
- Click on the button Copy to File… (1):
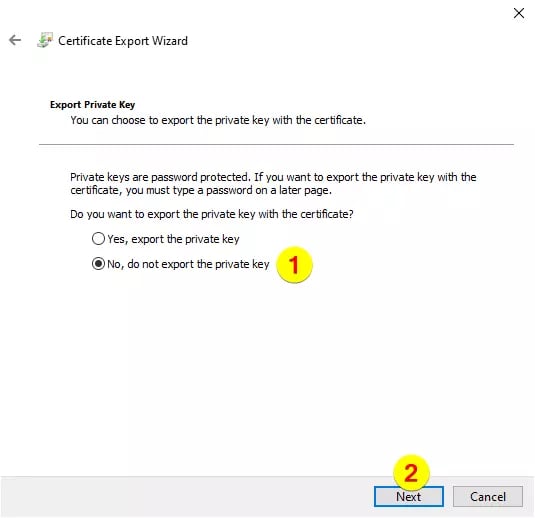
- Within the Certificate Export Wizard, select No, do not export the private key (1) and click the Next button (2).
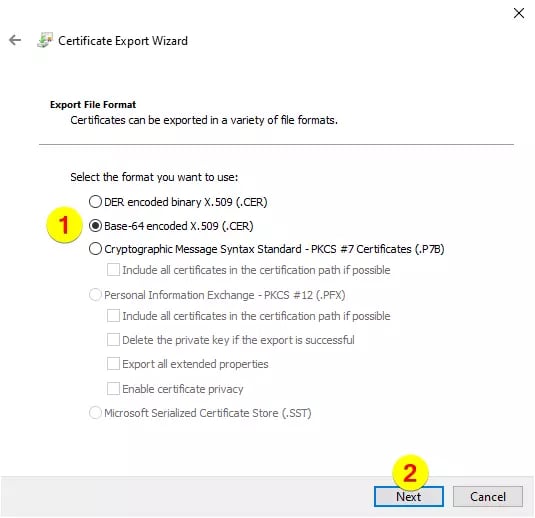
- Choose the file format Base-64 encoded X.509 (1) and click on the Next button (2).
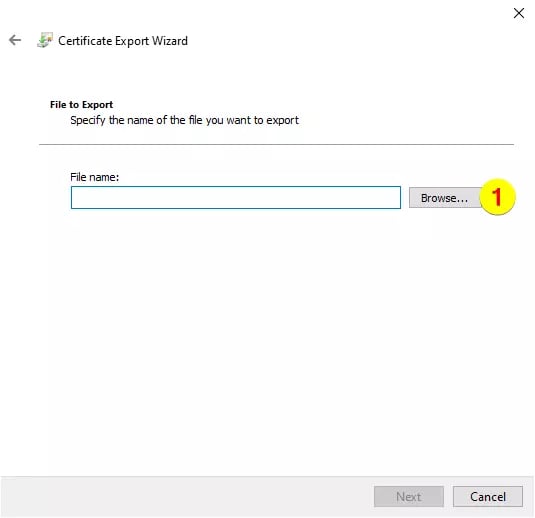
- Click on the Browse… button (1) then save the file to a convenient location:
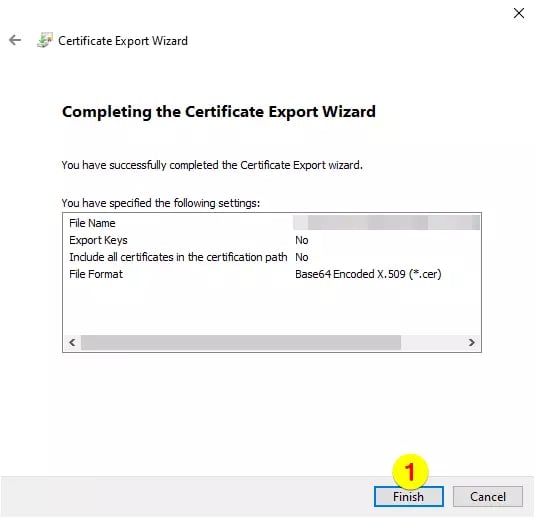
- Review for correctness and then click the Finish button (1).
- Back in the certificate properties dialog, close the dialogue by clicking the OK button (1):
Now that the certificate has been created and successfully exported, the remaining steps in Google IoT Core can be completed.
Step 4: Add a Device to your Google Cloud IoT Core Registry
The next step is adding a device to the registry you just created that will push and/or pull data for the registry.
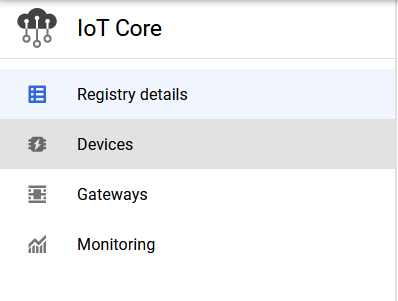
- Still under IoT Core and your Registry that you've created, select the Devices tab from the left-hand menu.
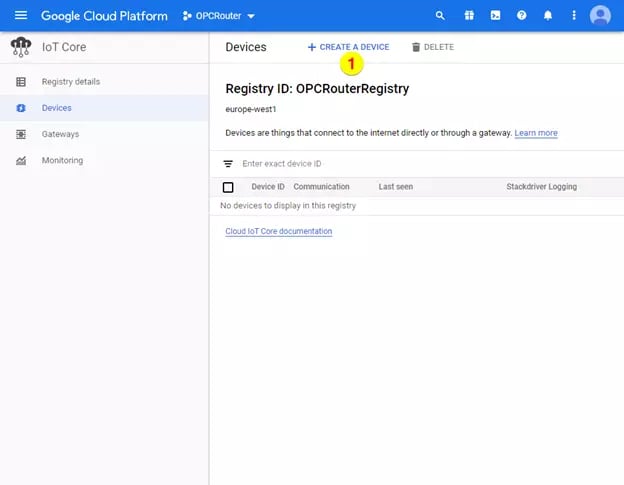
- Then click the CREATE A DEVICE button (1) at the top.
-
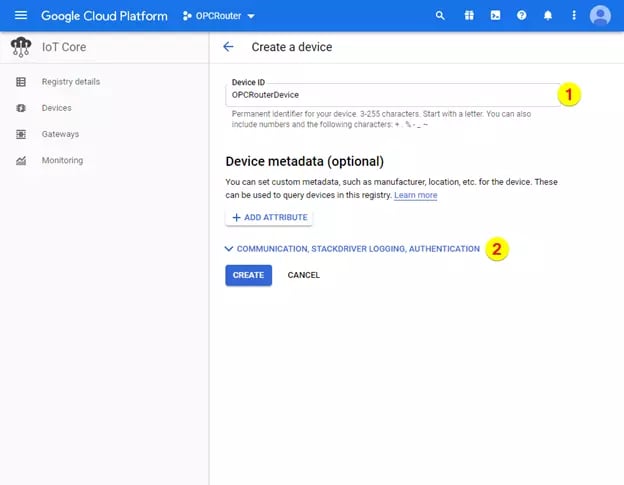
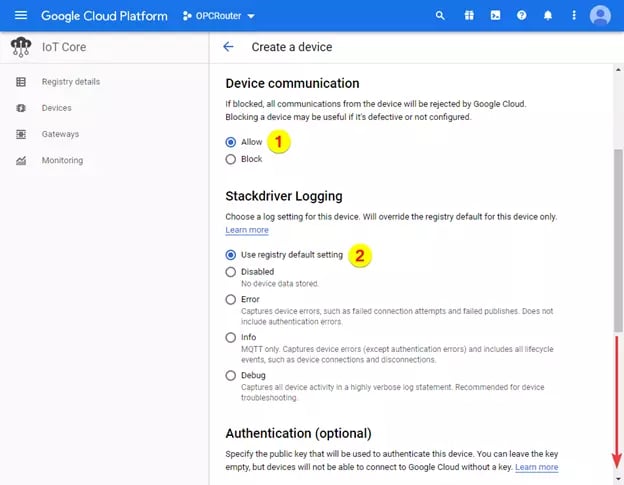
Enter the desired Device ID (1) to represent your device - something meaningful is recommended and click to expand the COMMUNICATION, STACKDRIVER LOGGING, AUTHENTICATION settings (2).
- Allow the device communication (1), use the default settings of the registry for the “Stackdriver Logging” (2).
- For Authentication, choose the Input Method “Upload” (1), use the Public key format “RS256_X509” (2) and click BROWSE (3) in the Public key value field:
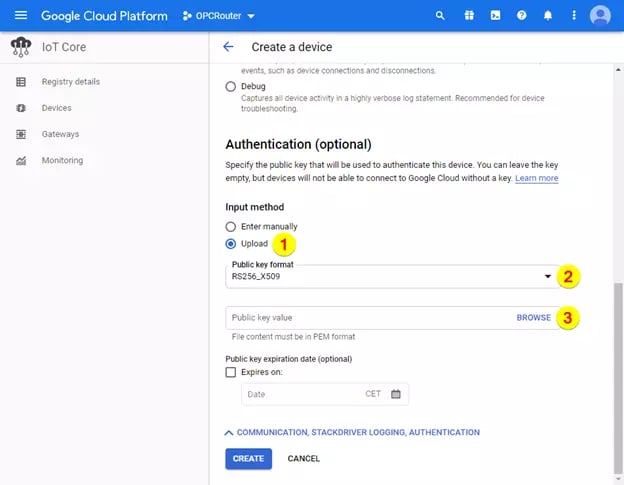
- Browse to and select the certificate that was created previously in OPC Router and click on the Open button.
- Back in the Device properties, click on “CREATE” to finish the Device.
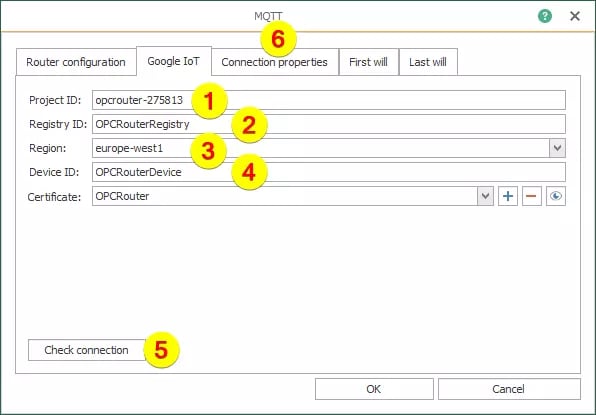
- Back in OPC Router, let’s complete the MQTT plug-in settings and check the connection. In the MQTT plug-in settings, enter the following data from your Google IoT Core project, registry and device properties:
- Project ID (1)
- Registry ID (2)
- Region (3)
- Device ID (4)
- After that check the connection by clicking the Check Connection button (5) and then click on the Connection properties tab (6):
- The settings for the three tabs Connection properties, First will, and Last will do not need to be modified so you can simply click OK to complete the MQTT Plug-in configuration in OPC Router.
- Here is the finished MQTT entry in the OPC Router MQTT Plug-in configuration:

- And here is an example of the OPC Router visual workflow for the transfer of temperature data from a database to Google IoT Core (a similar workflow could be used for transferring data from any other data source that OPC Router has supported connectors for):
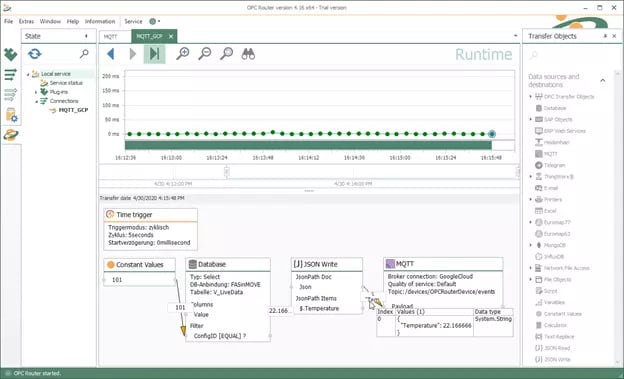
- As such, your next step would be setting up a similar workflow specific to your own OPC Router configuration and available data sources (for details on setting up specific data sources, the OPC Router basic training video is available here).
Step 5: Monitoring / Confirming Data Transfer from OPC Router to Google IoT Core
With everything is configured in OPC Router (including your workflow) and Google IoT Core, you can confirm data transfer from OPC Router to the device in Google IoT Core using GCP Shell back in Google IoT Core.
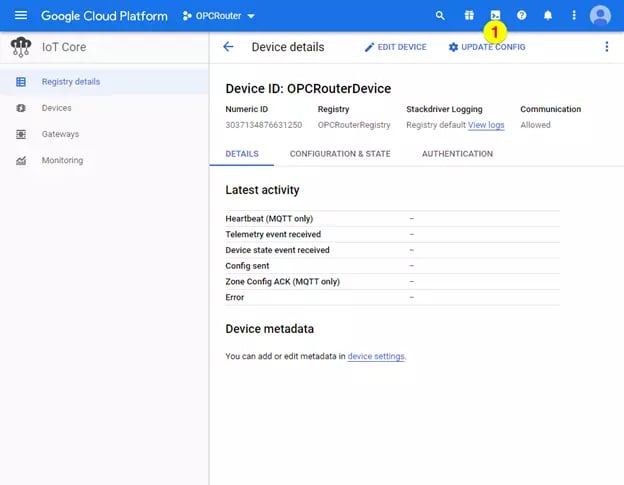
- Open Google GCP Shell to view the transferred data by clicking the GCP Shell button (1) at the top:
- You can use the following commands to display the transferred data:
- Determine topic list:
gcloud pubsub topics list - Subscribe to watch topic:
gcloud pubsub subscriptions create –topic - Read last transferred data record:
gcloud pubsub subscriptions pull –auto-ack
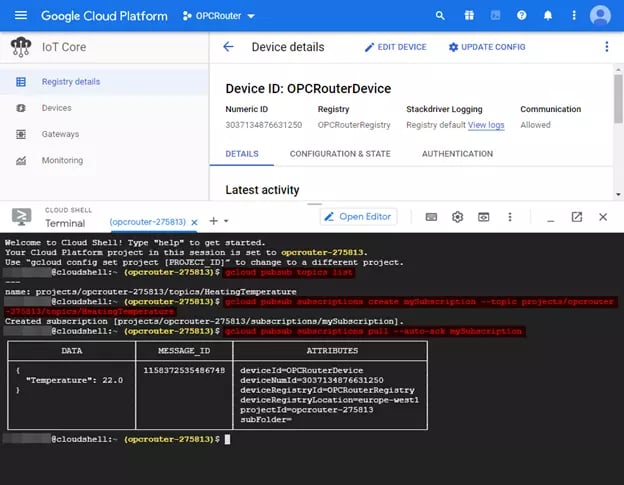
- Determine topic list:
So, in closing, it's relatively straightforward to get setup integrating your own OPC Router data sources to the Google IoT Cloud with OPC Router's Google IoT specific cloud profile.
And though the above steps focused specifically on pushing OPC Router data to the Google Cloud, it's also possible to consume data from Google Cloud IoT Core and transfer it to other systems supported by OPC Router, which we will cover in more detail in a future companion blog post.
As long as you have a free or paid Google Cloud IoT Core account, you can test things out with your own data sources with a free trial of the OPC Router. And make sure you don’t miss future useful topics on OPC Router and other helpful industrial automation topics by subscribing to our blog.