So remember in  where you just have a protocol document from the manufacturer for a device you need to integrate with your control system? And for this new device, there is no existing, off-the-shelf connectivity driver or server available.
And remember asking yourself, “How do I connect to this non-standard device?” With custom software development being very expensive and time-consuming, we discussed a better way using  .
.
This post, the second of three, goes beyond the protocol details we gathered from the document in  to provide the basics on how to actually use those details to build a working protocol in OmniServer without custom code for a fast, affordable solution with industry-standard client interfaces including as OPC DA and UA.
So last month we talked about the challenges of integrating the multitude of “non-standard” devices out there without a common protocol like Modbus where there are no existing drivers or servers on the market. Again, typical devices falling into that category that we’ve seen over the years are barcode scanners, weigh scales, printers, RFID systems, sensors and so many more.
And the key focus of the post last month was going through documentation that the manufacturer of that devices has provided to find the necessary details for the commands and responses needed for communicating with those devices.
So now you’ve reviewed your documentation and found all of the relevant details that we discussed last month that you need to get started using OmniServer. But what are the next steps?
I’m going to go through what the steps are, in general, to get you oriented to working with OmniServer and what the process looks like. Then, if you’re ready to start working on your own protocol, I’ll give you access to a how-to document that goes into more detail.
Step 1: Create a New Protocol in OmniServer
The first step in working with OmniServer is always to create your Protocol. The Protocol is the heart of all communication operations in OmniServer. It is responsible for all sends and receives to the device.
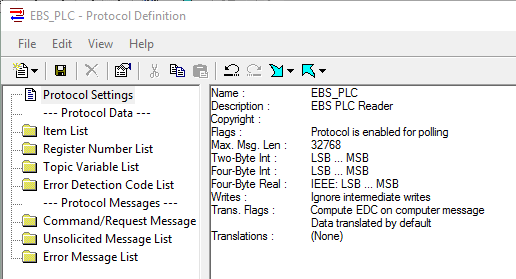
This includes taking data from your client applications (HMI/SCADA and others) and properly formatting that data such as written setpoints or other variables or configuration settings so that the device recognizes the data and executes the request.
And, just as importantly, the Protocol is responsible for interpreting data coming in from the device, separating out the data you’re expecting and sending it to your client application.
The Protocol includes all of the variable items, messages to and from the device, error detection codes and more.
Think of the Protocol in OmniServer the way you would think of a “driver” in your typical off-the-shelf server for communicating with a specific device. You will have a unique Protocol in OmniServer for each type of device using the same protocol.
Ready to get your hands dirty? 
Step 2: Create the Register Numbers in the OmniServer Protocol
In an OmniServer Protocol, we define addresses/registers (used mainly by PLCs or RTUs) in what is called a Register Number. This will allow us later to describe the data item with a number at the end of the name, thereby telling OmniServer that we want the data from a particular register.
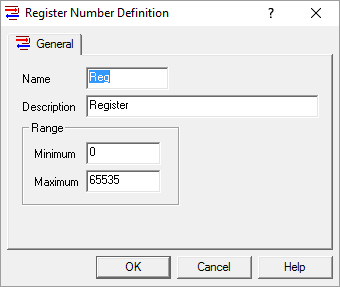
This keeps us from having to define one item for every address we need to address in the device, which is a great tool for time-saving when building an OmniServer protocol. Do you have to use Register Numbers? No. You can explicitly define each item you need and hard-code the address in the host message.
This means you will have to create a host message for each item. If there are 20 or so items, this is not a problem. If there are thousands, then this will be a burdensome task. So using Register Numbers are all about efficiency and time-savings when building your Protocol.
For further details on what Register Numbers are and how they work, see our  .
.
Step 3: Create the Items in the OmniServer Protocol
The next thing to look at is the number of data items to be returned by the device. An Item is how your client application interacts with OmniServer for commands and requests. Through Items, your client can pass data to the server for further processing, and in turn, the server parses data and sends it back to the client through the Item.
Register Numbers can be used in conjunction with Items to allow you to minimize the number Items you have to define in your OmniServer protocol. When using Register Numbers, OmniServer can read in only one item at a time, so the Item count will automatically be one data item for each register.
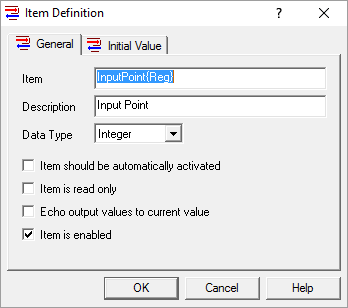
What OmniServer will do is read in the number at the end of the Item name and associate that number with the Register Number “Reg”. Any place that “Reg” appears in a message, that number at the end of the data item will be inserted.
And for responses from the device containing that register number, the value will be passed into that specific instance of the item. Again, for further details on what Register Numbers are and how they work, see our  .
.
Step 4: Create the Command/Response Message in the OmniServer Protocol
Now we need to tell OmniServer how to communicate with the device. This is done through a Command/Response Message.
Command/Response Messages are designed to obtain responses from or send data/commands directly to the device. This is accomplished through the Request and Response portions of the message.
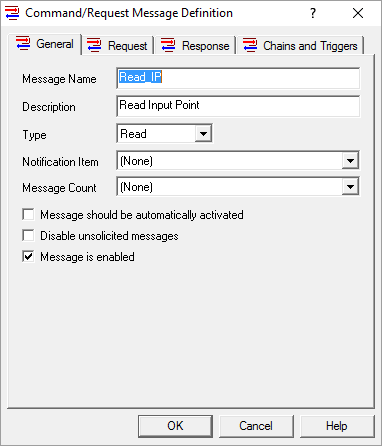
For further details on the different settings available in the Command/Request Message definition, I encourage you to  .
.
Step 5: Save the OmniServer Protocol
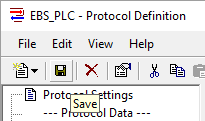
Last, but certainly not least, make sure to save all of the changes you’ve made in your OmniServer Protocol. I always recommend saving frequently just to make sure you don’t inadvertently lose any important work you have done.
And, if all that you’ve seen is more than you have time for, just remember we do have affordable professional services which is a popular option for users who would really just like us to take care of it all for you while delivering training and support like you would get with any off-the-shelf driver.
Once you have your OmniServer Protocol ready to test, the bulk of the work is behind you. Make sure to  so you don’t miss the rest of this series where next month we’ll polish things off by creating a Topic and Device, in addition to going through the testing process to debug your new Protocol.


