While Cogent DataHub is, of course, primarily known for its extensive connectivity interfaces, just as important is how you, the user, are able to intuitively use and configure the functions in DataHub, both locally and remotely.
In this first blog post of a detailed series on specific DataHub Version 9 features, I'll provide insight into the new Remote Configuration capabilities and show you how Cogent DataHub V9 provides a secure, reliable and easy-to-use configuration experience locally and remotely.
Remote configuration for Cogent DataHub is a much-anticipated new feature of Cogent DataHub Version 9 (for highlights of the other key features, click here). This feature allows you to interact with a local DataHub instance while it is running as a Windows service or remotely configure any DataHub instance across your enterprise.
In previous versions, as you are likely aware if you’re an existing user, you had to interact with the DataHub service using the service console. Once Windows 10 was released the service console became obsolete and the only way to interact with the DataHub v8 was to stop the service, open the DataHub as an application and make your changes. This did not provide the best user experience.
This is why the new Remote Configuration feature is included for free with any version 9 license. Contact us if you would like to upgrade your DataHub licenses to Version 9.
With security always being a top priority of ours, the DataHub will install in a secure fashion, meaning Remote Configuration is disabled by default. You can apply the following steps in this blog or watch our How-To Video to see how to allow for Remote Configuration in your DataHub installations.
Enabling Secure Remote Connections in Your DataHub
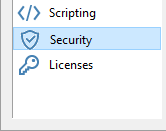
- Start by launching the DataHub you wish to be able to configure remotely and open the Security section of the configuration.
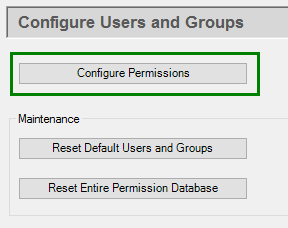
- Click the Configure Permissions button.
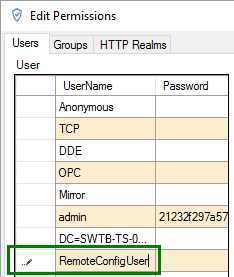
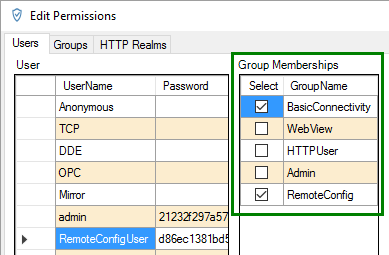
- Add a new user by clicking in the last row of the UserName column and start typing. For example, we are going to add a user called "RemoteConfigUser" and hit Enter.
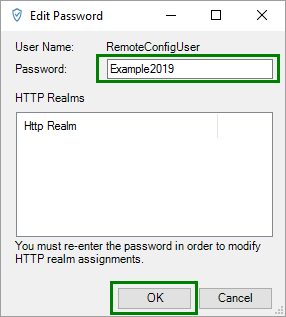
- Click in the Password column for the RemoteConfigUser, which launches the "Edit Password" dialog box where you need to set a password. The password MUST be 8 or more characters and mixed case (at least one capital letter). After typing the password hit OK. (HTTP Realm is not currently used, at this time, and can be disregarded.)
- Set the new RemoteConfigUser to be part of the BasicConnectivity and RemoteConfig groups. These 2 groups have the permissions needed to allow Remote Configuration Access.
- If you don't have the RemoteConfig group available (meaning you've had a previous version of DataHub installed), you can use one of the following options to add it (just make sure to then go back to your user and add it to the "RemoteConfig" group:
- Click the "Reset Default Users and Groups" button. (this will only reset the Default Users and Groups but will not affect any additional users that were added, including the 'admin' user. Any changes made to the 'admin' user will need to be reconfigured).
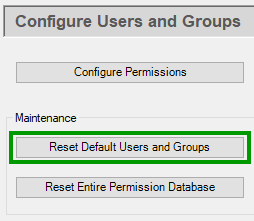
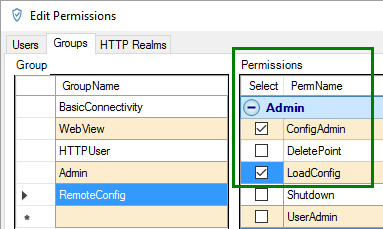
- Or you can simply add a new "RemoteConfig" group with the Admin permissions "ConfigAdmin" and "LoadConfig" enabled.
- Click the "Reset Default Users and Groups" button. (this will only reset the Default Users and Groups but will not affect any additional users that were added, including the 'admin' user. Any changes made to the 'admin' user will need to be reconfigured).
- Click Apply and Close on the Security Permissions dialog and click Apply on the Cogent DataHub Properties dialog.
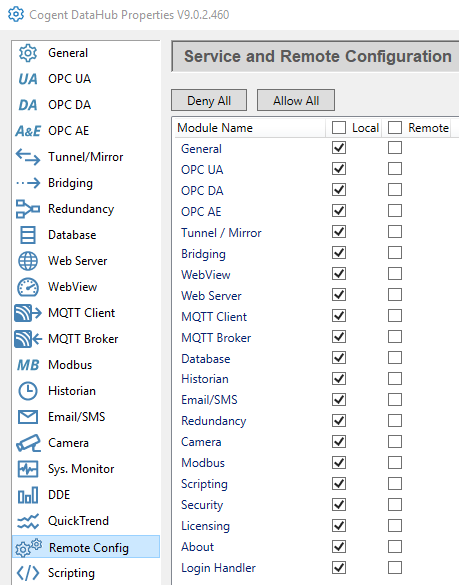
- Finally you can control which features can be configured Locally or Remotely when using Remote Configuration. Check all the features you want to enable and click Apply.
You have now set up your DataHub to allow Remote Configuration Permissions for the new user you created. You will need to follow these steps on any other DataHub's you wish access by Remote Configuration.
Prefer to Watch the Video? Click Here!
Making a Secure Remote Connection to Your DataHub
Now let's establish the connect between the DataHub Remote Configuration app and the DataHub.
- Open "Remote Config" from the Start Menu under the Cogent section. You will be presented with the following login screen.
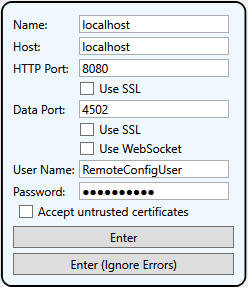
- Specify the IP Address or DNS Host Name in the Host section for the machine where the DataHub you wish to configure is located (localhost is the default and allows you to configure the local DataHub running as a Windows service). The Name is a friendly name you can associate with this connection.
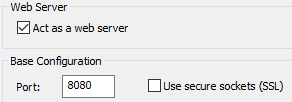
- You need to specify the DataHub Web Server port for the DataHub instance you want to configure in the HTTP Port section, including whether SSL is enabled for that port.
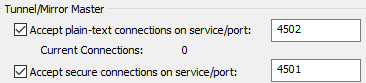
- You also need to specify the Tunneling Port of the DataHub instance you want to configure in the Data Port section, including whether SSL is enabled for that port.
- Specify the User Name and Password you created in the first section and click Enter.
- You should now be connected to the DataHub remotely for configuration.
This new remote configuration capability enhances the DataHub's ability to have a connected enterprise on all levels, from the smallest sensor all the way to the cloud and everywhere in between. Click below to request your Cogent DataHub V9 free trial. And don't forget to subscribe to our blog to receive notifications about additional posts in this series, as well as, other important announcements and resources like this in the future.