If you're a TOP Server for AVEVA (formerly Wonderware) user, you've certainly connected to a device configured in TOP Server using a topic name. But did you know you can create custom topics called aliases with any meaningful name you would like to represent your devices?
Continuing our Tech Support Corner blog series, this blog post covers how to easily add define meaningful aliases for your devices in TOP Server for use as topics in your client applications.
To represent a device in TOP Server, you define a channel (which is where you select the appropriate driver or protocol for communications and the physical connection to the device) and a device (which is where you define the settings required to communicate with a specific physical device). And, as part of that configuration, you give the channel and the device a name in TOP Server.
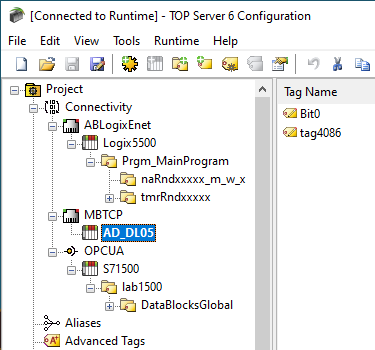
By default, the topic you would then use to communicate with that specific physical device from your client (AVEVA InTouch, for instance) would be the combination of the channel name and device separated by an underscore for SuiteLink clients (i.e. ChannelName_DeviceName) and, for OPC connections, the separator is a dot.
While this is easy enough to follow, such a topic can be less than ideal with respect to length and meaning. Additionally, for non-OPC clients, you may need to define more than one topic to control the polling frequency. So it's often desirable or even necessary to provide a more meaningful or shorter topic name for your devices. This is where the Alias Map in TOP Server comes in.
Why Use the TOP Server Alias Map?
Aliases created in TOP Server serve the following purposes:
- It's an easy way to provide a more meaningful topic to represent your device - this is useful in situations where you simply want the topic you use in a client application to be easier to identify.
- It's an easy way to provide a shorter topic to represent your device - this is useful in situations where the combination of a channel, device and/or group name is undesirably long.
- It allows you to define more than one topic to represent the same device - this is useful because each alias allows you to define a unique Scan Rate Override value, which controls the polling frequency for tags requested by non-OPC client applications for that topic.
Add a New Alias / Topic in TOP Server
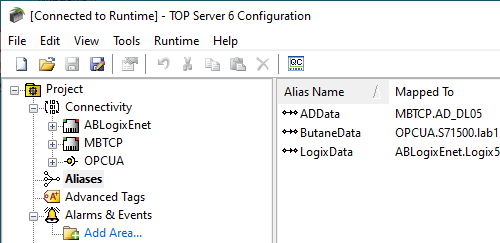
TOP Server V6 has an integrated Alias Map view visible in the same tree view as your channels and devices and other configuration components (NOTE: if you're reading this and you happen to still be working with TOP Server V5, the Alias Map is accessible from the Edit menu). Just find the entry "Aliases" to find the Alias Map.
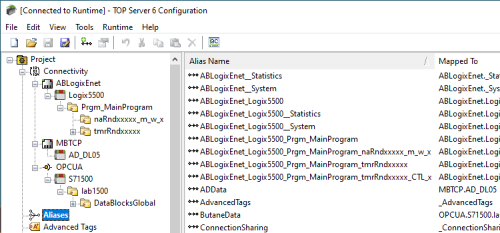
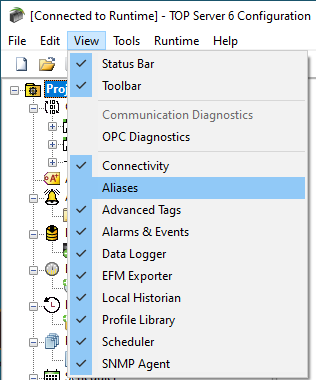
If you don't have an entry in the tree view labelled "Aliases" it may be hidden - go to the View menu and select "Aliases" so that the Alias Map will display in your tree view.
To add a new alias, you can do one of the following:
- Right-click on "Aliases" in the tree view and select "New Alias".
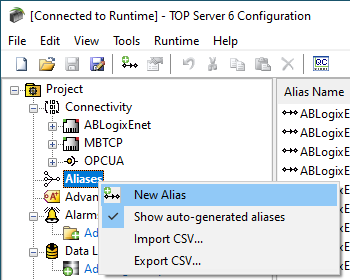
- With "Aliases" highlighted, go to Edit > Aliases and select "New Alias".
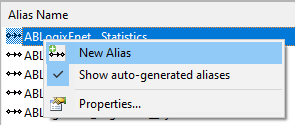
- Right-click in the "Aliases" view to the right of the tree view and select "New Alias".

You'll then need to define the following properties for your new alias/topic:
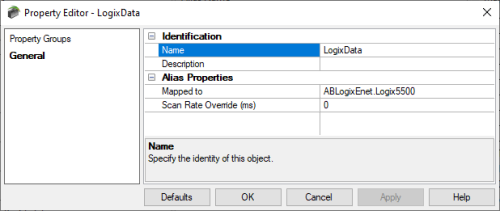
- Name - This is the actual alias /topic name you will use in your client application.
- Description - An optional field for providing more information about this alias.
- Mapped to - This is the channel/device/group combination you want this alias to represent - you'll simply click the "..." button at the right of this field to browse your channels and devices and select the desired mapping.
- Scan Rate Override (ms) - The default is 0 ms, which means the client-specified default scan rate will be respected. Entering a value other than 0 here results in the server polling the mapped to device at that scan rate for any tags being requested by a non-OPC client through this alias/topic.
What is an Auto-Generated Alias in TOP Server?
You may notice that, by default, there are already existing aliases displayed in the Aliases view - these are referred to as "Auto-generated aliases" and correspond to topics for configured channels and devices along with system tag groups.
This can be a good way to confirm you're using the proper syntax for the topic you're using in your client application. However, if you plan to exclusively use your own defined aliases, those auto-generated aliases can just clutter the Aliases view.
No worries - if you prefer, you can simply choose not to display those auto-generated aliases in one of the following ways:
- Right-click on "Aliases" in the tree view and de-select "Show auto-generated aliases".
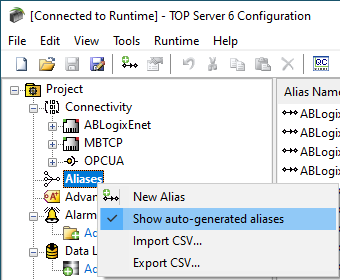
- With "Aliases" highlighted, go to Edit > Aliases and de-select "Show auto-generated aliases".
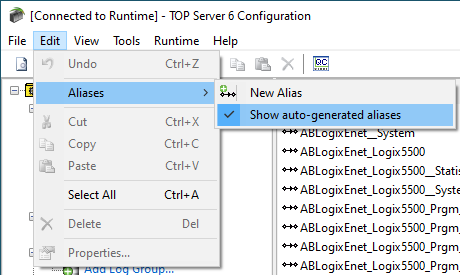
- Right-click in the "Aliases" view to the right of the tree view and de-select "Show auto-generated aliases".
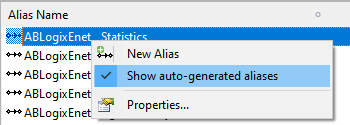
Once you've hidden the auto-generated aliases, you can see it's much easier to view your own custom aliases.
Alias Import and Export in TOP Server
And last, but not least, the Alias Map in TOP Server also supports CSV import and export for situations where you need to add or edit a large number of aliases/topics or move aliases between TOP Server instances. Importing and exporting aliases is as simple as right-clicking on "Aliases" in the tree view and selecting "Import CSV" or "Export CSV".
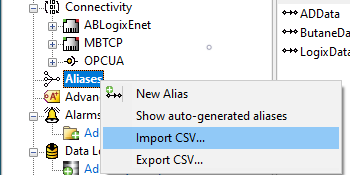
To ensure your CSV file has the right columns/fields, we recommend performing an export of at least one alias first and then using that CSV file as your template for editing in Microsoft Excel or any other CSV editor.
The TOP Server Alias Map is a useful tool that is sometimes overlooked in the process of configuring the TOP Server project for communications. As you can see, it's an easy way to customize how your client applications make connections to your devices and control scan rates for non-OPC clients.
Don't forget to subscribe to our blog for other useful how-tos, tips and updates like this. Ready to try the TOP Server Alias Map and get connected to your devices?


