Those of you who are aware of OmniServer will already know that it is primarily used to retrieve information from devices that use 'non-standard' protocols to communicate, such as weigh scales, barcode readers, and printers. An HMI, SCADA, MES, Historian, database, and more, could then read that data from OmniServer, making it a powerful, universal, data acquisition tool.
Some of these 'non-standard' device protocols require what we call "special handling". For most protocols, if you've used OmniServer, data that is sent or received is "what you see is what you get" type data. An ASCII "A" is transmitted or received and interpreted as an ASCII "A". But what if your device is expecting something else as part of its special handling in its communication protocol? Or what if you wanted to interpret the data differently from the device to meet new business standards or existing requirements?
OmniServer is capable of handling advanced protocols where the devices send special characters/bytes that need to be handled in a specific way. In this blog, we will explain how to use a feature called "translations" in OmniServer with certain protocols that require special handling.
A Translation is a flexible special OmniServer element that gives you the ability to replace a specified byte or sequence of bytes with something else in your sent or received (or both) protocol messages. The Visual Protocol Editor allows you to configure the protocol with a table of characters which are defined such that, when those characters are encountered, they will be interpreted as a different defined character or sequence of characters.
Why Would I Need To Use Translations?
With devices that have such protocols implemented where "preamble" characters are used to define a special handling situation, OmniServer translations make it possible to properly parse those data packets. A common example of this is with devices that send a "double DLE", where two DLE characters (ASCII 16, Hex 10) are sent by the device to represent a single DLE character.
Another very common situation where this becomes a problem is when data transmission is done with binary encoded information, and not the ASCII representation. For example, when an STX character (0x02, ASCII 2) represents the beginning of a new frame, how can the device differentiate between an STX character, and any data values that happen to have a 0x02 in it?
Most devices in such situations will, therefore, prefix an STX character that should be treated as the beginning of a new frame with a DLE character such that 0x10 0x02 represents a start of text. That way a 0x02 not prefixed by a 0x10 will be treated as just that, a binary 2.
It's just another way that OmniServer provides advanced custom protocol server capabilities allowing the successful integration of devices that would otherwise require custom code.
How Can I Implement Translations?
Creating a translation within your OmniServer protocol is a painless process, especially with the Visual Protocol Editor at our disposal. Below you will find the step-by-step procedure on how to accomplish this:
(For new users, if you'd like an introduction to using OmniServer, please click here.)
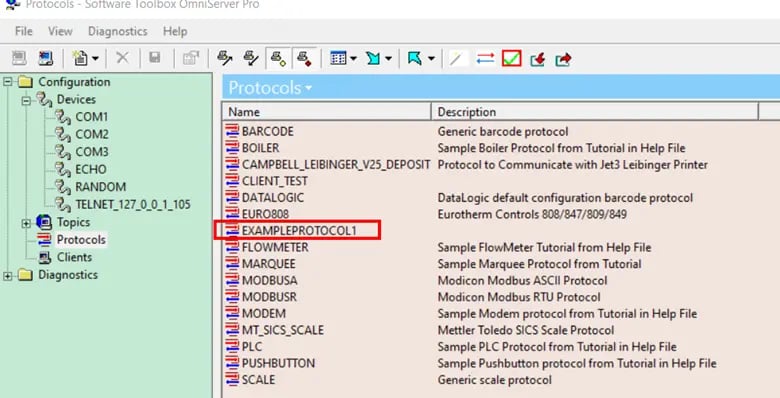
- In the OmniServer Configuration, either open your existing protocol configuration or create a new protocol. For this example, we have created a protocol named EXAMPLEPROTOCOL1.
- Once in the Visual Protocol Editor, navigate to the Translations tab under the Protocol Settings.
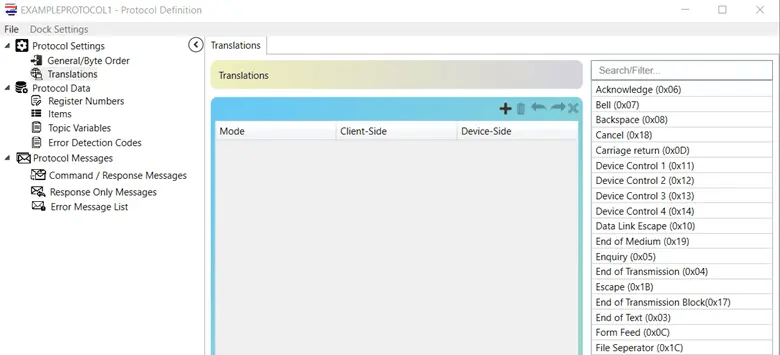
- Click the + button to add a new translation:
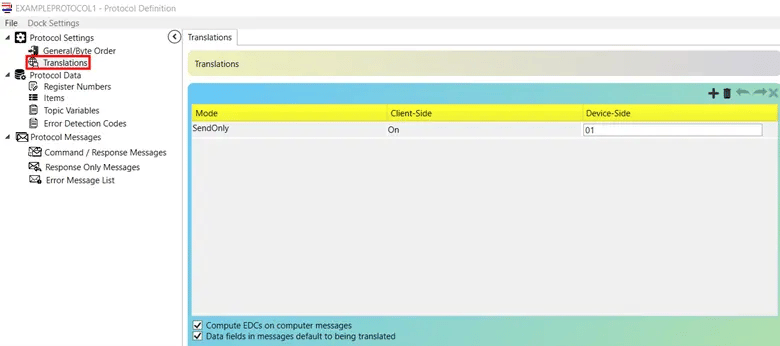
- Select the Mode to define which direction the translation should be applied to the protocol: Send Only, Receive Only, or both Send and Receive.
- In the Client-Side field, type the character sequence as it will appear to the OmniServer (so, on a Send, this would be the pre-translation of the request and on a Receive, this would be the post-translation of the response from the device).
- In the Device-Side field, type the character sequence as the device will be sending it, or as the device will expect to receive it (so, on a Send, this would be the post-translation value being sent to the device and on a Receive this would be the pre-translation of the response from the device).
- Now save your protocol by navigating to File > Save.
Congratulations! You just created your first translation!
At the bottom of the Translations menu, you will also see two check boxes marked.
Compute EDCs on computer messages tells OmniServer to calculate all of the error detection routines (checksums, CRCs, etc.), where applicable, based upon the message after translation - that is, after the "remote" message has been translated to the "computer" message. Only rarely would you not have this checked.
Data fields in messages default to being translated tells OmniServer that all of the data fields will be translated by default. If this box is not checked, then the only way any field will be translated is if you add the "T+" field modifier in your protocol messages. Usually, you will want to keep this one checked as well.
Where Can I Get More Information?
Do you have a protocol that you’re not really sure about? As always, we're happy to help with a complimentary protocol review of your protocol documentation or to answer questions you may have.
Email us at support@softwaretoolbox.com with your questions and subscribe to our blog for more quick and easy OmniServer tutorials and tips. Then, make sure to download the OmniServer trial to try it yourself for free.