Developers that have leveraged our OPC Data Client toolkit for their custom OPC client development needs know that we’ve historically supported Python as a COM development language, but that had always come with limitations and a desire from our user base for a more modern option.
In the latest V2023.2 release, OPC Data Client now adds support for Python.NET, while also announcing the deprecation of the older COM approach. The newer Python.NET option offers many advantages including, but not limited to:
- Modern, maintained Python.NET package (pythonnet), instead of the older pypiwin32 package
- More than 270 Python.NET examples
- Support for PyCharm as a primary development environment.
- Added performance and reliability that comes from using the OPC Data Client .NET API over the COM API
- Access to .NET features, such as generics, methods overloads, and callbacks
- Easier coding
Now that we have a basic understanding of the advantages that Python.NET has over its predecessor, let’s see it in action!
Getting Started with Python.NET
Prerequisites
- .NET Framework 4.7.2 or .NET 6 or 7 (or possibly higher version).
- PyCharm (https://www.jetbrains.com/pycharm/). PyCharm Community Edition is sufficient.
- Internet connection with access to https://pypi.org/ (for downloading Python packages)
- OPC DA or OPC UA Server such as TOP Server or OmniServer. For this example, we will be using OPC UA.
See here for detailed instructions on installing the Python Packages.
Console Application to Read Value from OPC UA Server
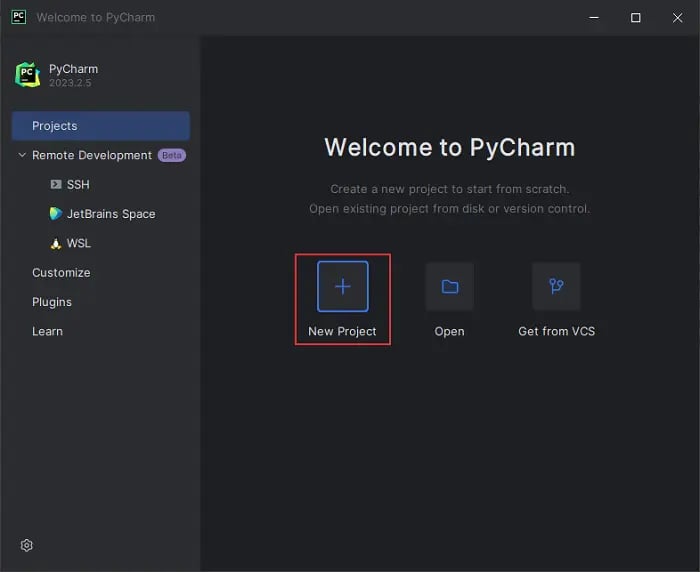
- In PyCharm, starting a new project is easy—simply choose 'New Project' from the welcome screen.
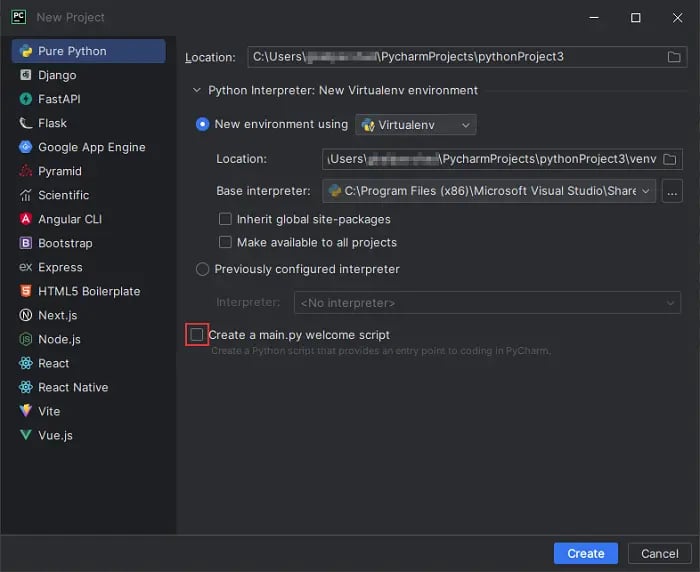
- Selecting the 'New Project' button reveals a page where you can modify settings related to your project's location. Uncheck ‘Create a main.py welcome script’ as it is not necessary for this demonstration and keep the rest of the default settings. Proceed by clicking 'Create'.
- If prompted by PyCharm, allow the Microsoft Defender configuration by pressing the ‘Automatically’ button, and further allowing PyCharm to make corresponding changes to the system.
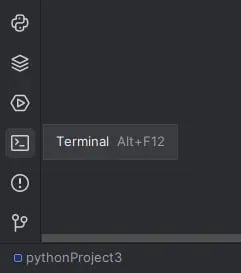
- Upon creation of our project, navigate to the PyCharm Terminal window, which is accessible from the navigation panel in the bottom-left corner, or by pressing Alt+F12 on your keyboard.
- Once in the PyCharm Terminal, enter the command ‘pip install opclabs_quickopc’ and press Enter. PyCharm will then collect and download the OPC Data Client packages. Throughout this blog, OPC Data Client is synonymous with any reference to OPC Labs QuickOPC, more on that later. Wait until the package is fully installed.

NOTE: You can confirm that the package is installed by selecting Python Packages from the navigation panel in the bottom-left corner and looking under ‘Installed’. This will also display the OPC Data Client version.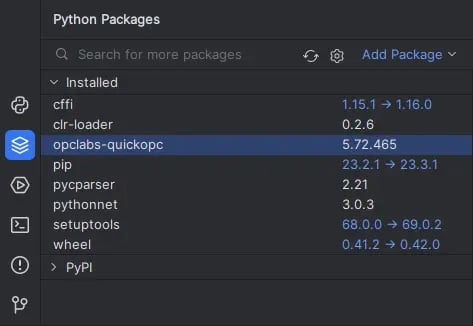
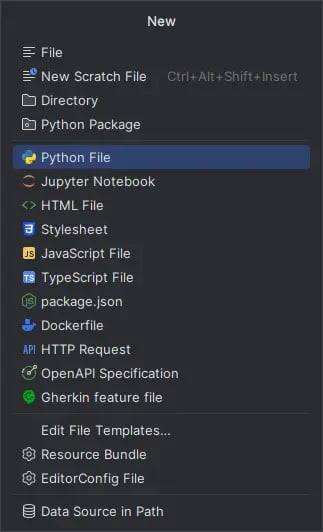
- In the PyCharm menu, select File -> New, and select ‘Python File’ from the options in the pop-up menu.
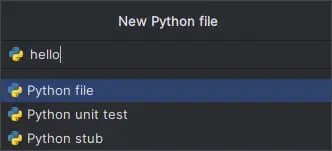
- In the New Python file window, type in hello for the Name, and press Enter.
- In the hello.py editor tab, add the following code, replacing the UAEndpointDescriptor and UANodeDescriptor with your UA Server endpoint details. We have used a simulated tag within our TOP Server OPC UA Server for this example. See our OPC Data Client User Guide and Reference for our full list of helpful example code.

- Select Run -> Run 'hello.py' (Shift+F10) from the PyCharm menu or press the corresponding green play/run button on the PyCharm toolbar. This will build and launch the program. The value will be read from the OPC server and displayed in the Debug Console window. Reading this item returned a value of 68, as seen below.

We hope this basic demonstration was helpful in showing how easy it can be to leverage the new Python.NET support introduced in OPC Data Client 2023.2 by using PyCharm as your development environment. This was of course a simple implementation and there is much more you could do with the OPC Data Client in Python.NET, as evident by our extensive code samples in the OPC Data Client User Guide and Reference.
Learn More, Upgrade, or Try the OPC Data Client
Throughout this blog, OPC Data Client is synonymous with any reference to OPC Labs QuickOPC. It is important to note that OPC Data Client is sold direct through Software Toolbox and we provide technical support by phone and email to users that purchase through us.
You can explore the various licensing options, including Standard, Professional, Enterprise, or Ultimate licenses, on our OPC Data Client ordering page. Wondering why you should use a commercial toolkit instead of alternatives? Visit this blog post, but in short, a lot has to do with availability of expert support!
Active support agreements are recommended for ongoing access to updates and technical support. This ensures that all users can easily leverage the benefits of Python.NET and other enhancements introduced in OPC Data Client 2023.2.
There’s more in this latest release that you can read about in the OPC Data Client release notes and in the online documentation.
Existing OPC Data Client License Owners
Developers are always advised to review our upgrade best practices before you upgrade.
If you already own a license of the OPC Data Client and are on an active support agreement, you can download the software from the trial version request page and upgrade for free by following the licensed user upgrade instructions.
Be sure to open the License Manager and look at your support expiration date. Your applications will generate exceptions if you try to recompile and run them on a version your support does not entitle you to use.
If you have an older license and aren’t on an active support agreement, you can still get the latest version with an upgrade fee that will also re-instate your support for an entire year. Contact us for upgrade options and start using Python.NET today!
Ready to try the latest OPC Data Client Toolkit? Download the free trial.


